

The below explanations assume that you have:
- An image of Ubuntu server (ex here : "ubuntu-20.04.3-live-server-amd64.iso")
- A VPS / root server with root access (ex here: netcup RS X000 root server) ready for you to set it up
- An FTP client (ex here: FileZilla Pro / FileZilla) to upload your image
- An SSH client (ex here Putty)
- Optional: maybe a text / notepad doc so you can set up the commands, adjust, and just then copy and paste them
I'm sharing my experience here, and this may not map to what you need / want, but I hope this is useful as a step-by-step guide. I couldn't find anything like this on the Netcup site, but then their prices are really interesting, especially if you can grab it with a promotion.
- Download the latest version of Ubuntu (live) server here, choose an LTS version. In the below example, I am using the 'Focal Fossa' version 20.04.3 LTS.
- Set-up your server on Netcup so that you have the Ubuntu LTS image uploaded to the temporary "cd-rom" folder, (Note: you are granted FTP access to this temporary folder, and it is just to give you access to these image files so they can be loaded in your virtual CD/DVD drive, do not upload backups with sensitive data, or images including proprietary data etc. to this folder).
- Go into the "Media" tab, select "DVD drive" and at the bottom use the "Login data to FTP" to create an account with FileZilla using the ID and password to connect to the server with the hostname (IP address). Upload your image into.
- Go into the "Media" tab, select "DVD drive" and scroll down to "Own DVDs", here expand it and you should see the list of images available to you (ie that you uploaded) and specifically here I can see my file "ubuntu-20.04.3-live-server-amd64.iso" (see image below).
- Once you have selected the ISO image next to "attach DVD", clicking on the name of ISO image and selecting "set boot mode to DVD", (also add your SCP login password), at the top of the page you will see the message "To activate changes, the server has to poweroff and poweron". As you can see below, you can also install using one of the other official DVD images:

- I then restart the server by selecting the option "Powercycle" in the "Control" tab, which restarts the server. This means that (by default) your server will boot off the DVD and will start the installation process.

- You'll then see a message saying "Server Stopped" followed by "starting Server" which switches to "Server started" once the process has finished.
- You can now go to the main "General" tab and click on the VNC function that should be a small thumbnail of the current state of the server in the far right hand top part of the panel.
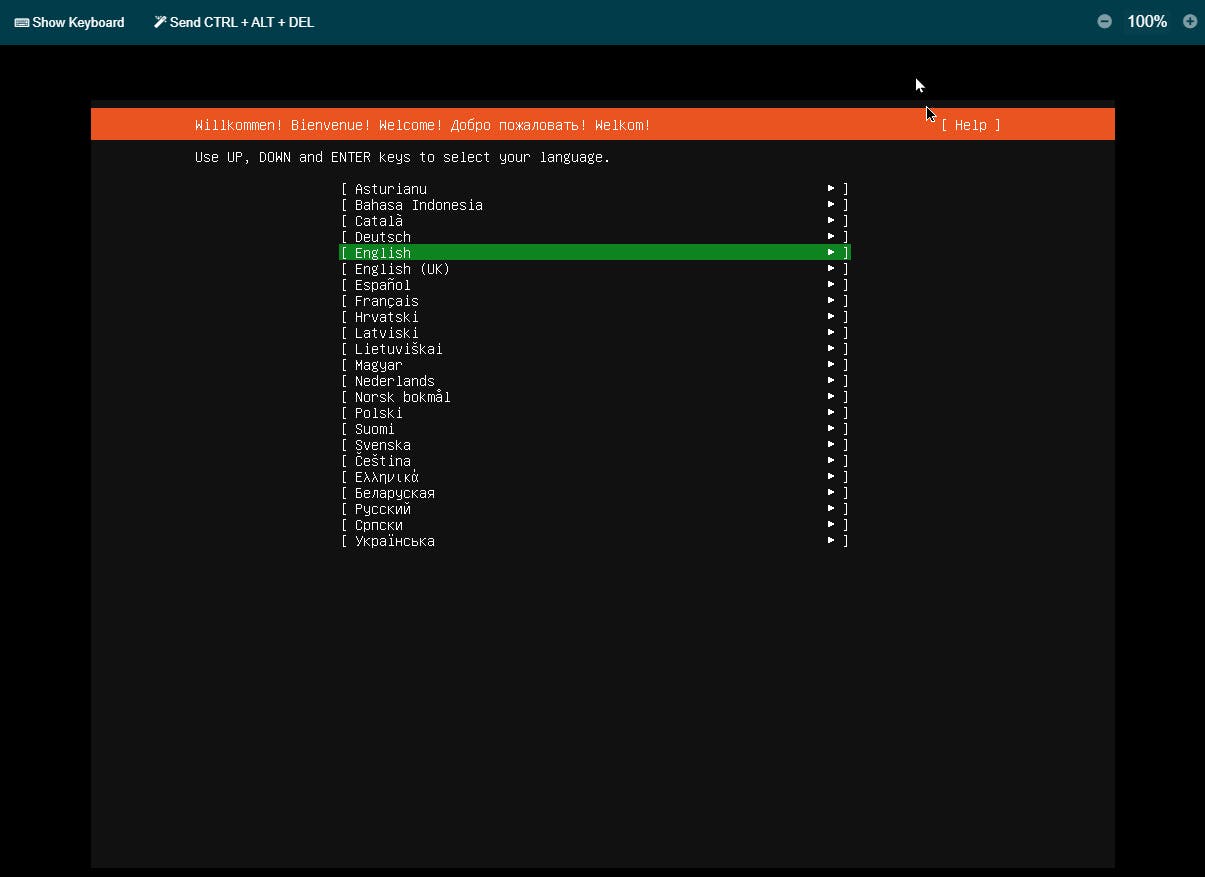
Selecting Your Language
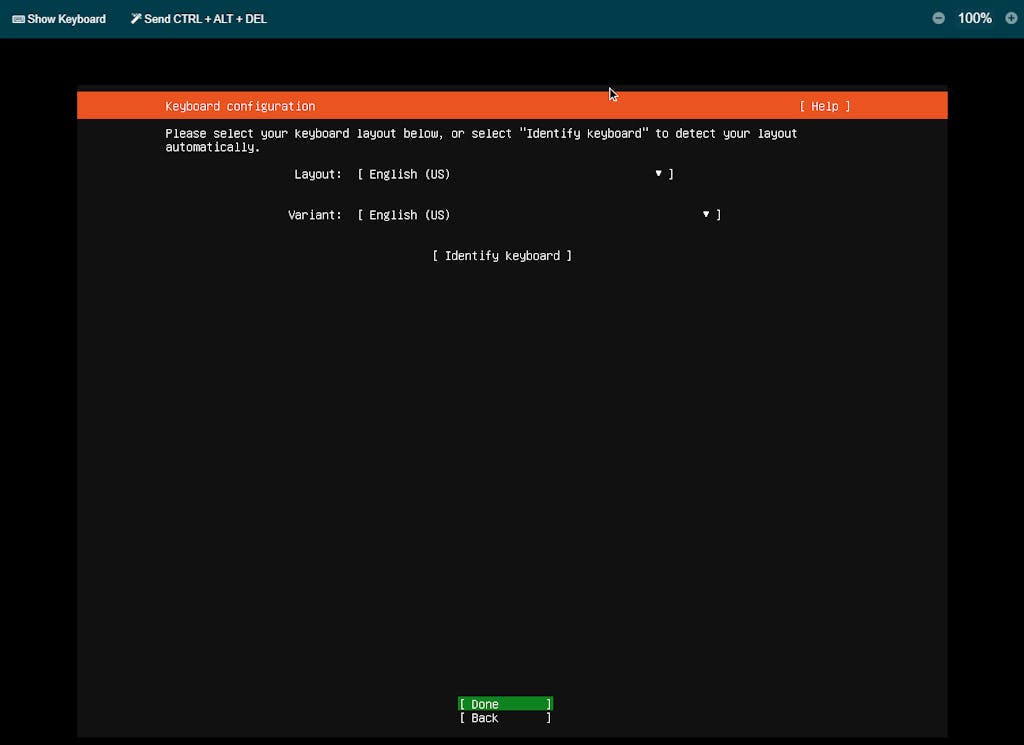
Selecting your keyboard layout

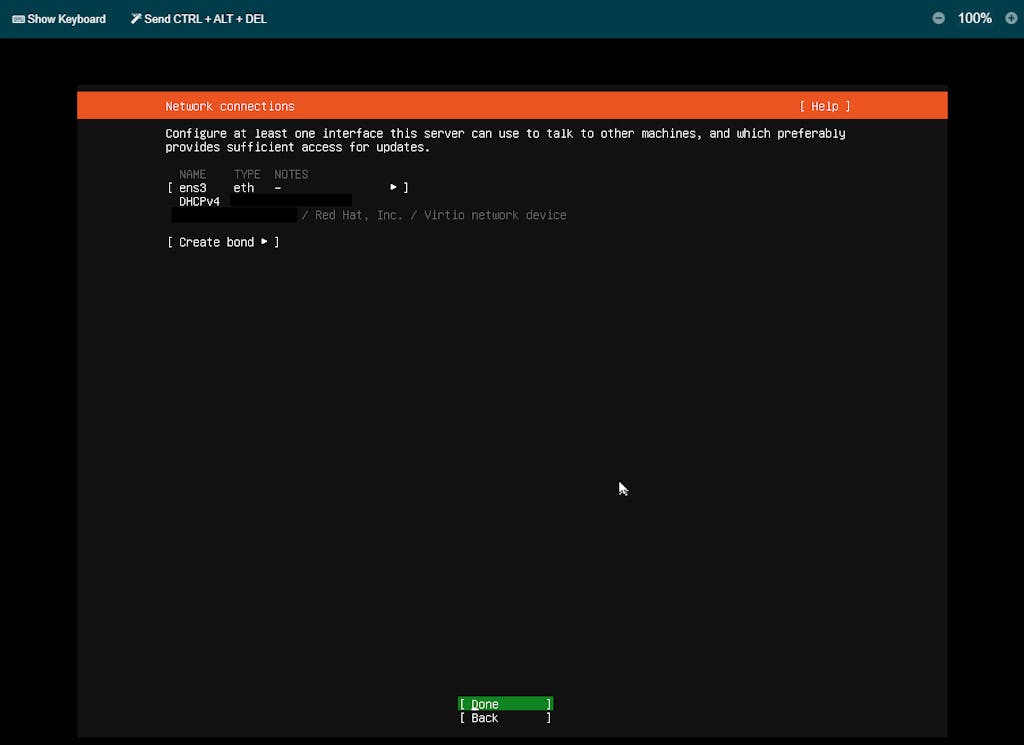
Selecting your network configuration
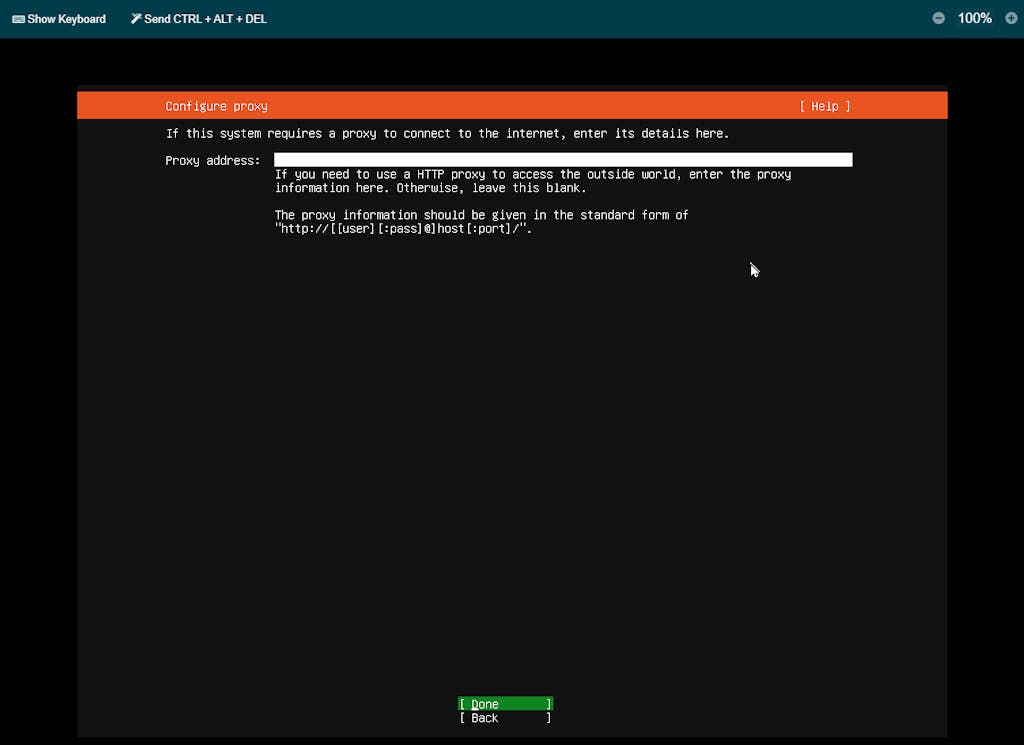
Define a proxy if you need it (otherwise leave blank: default)
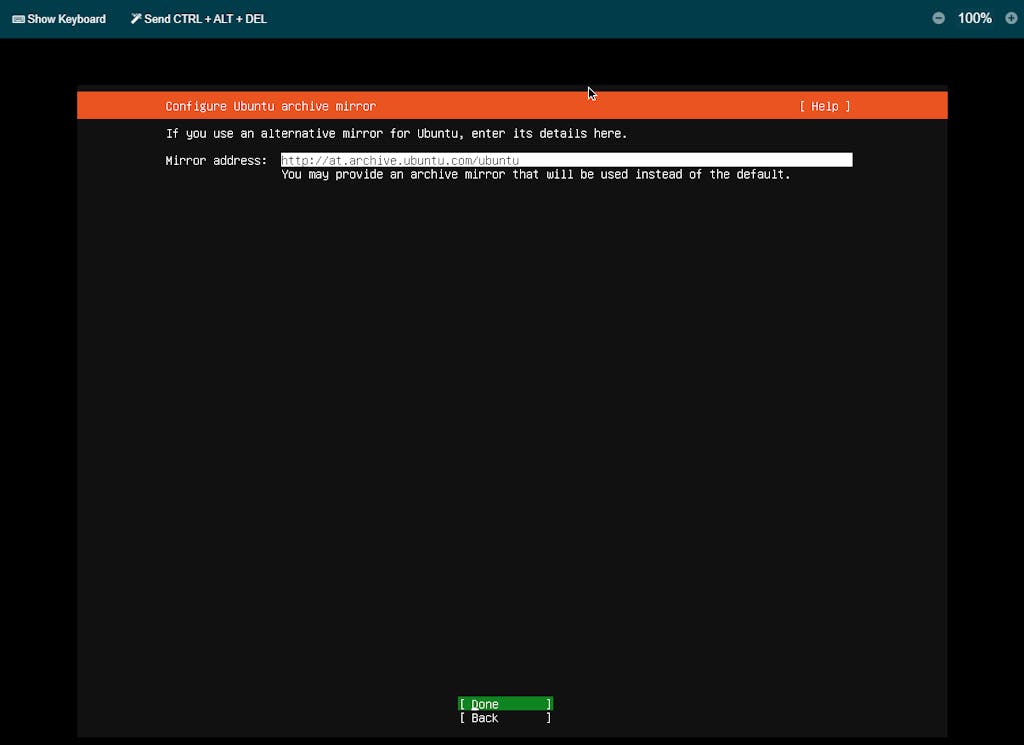
If you need to define an alternative archive mirror, do so at this point
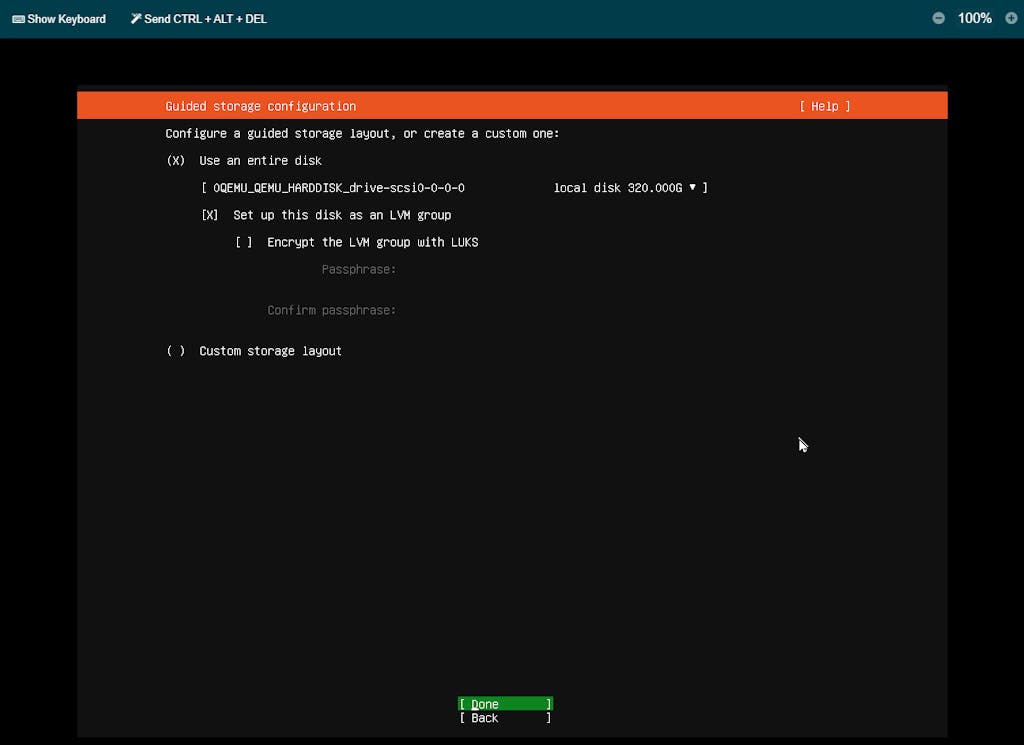
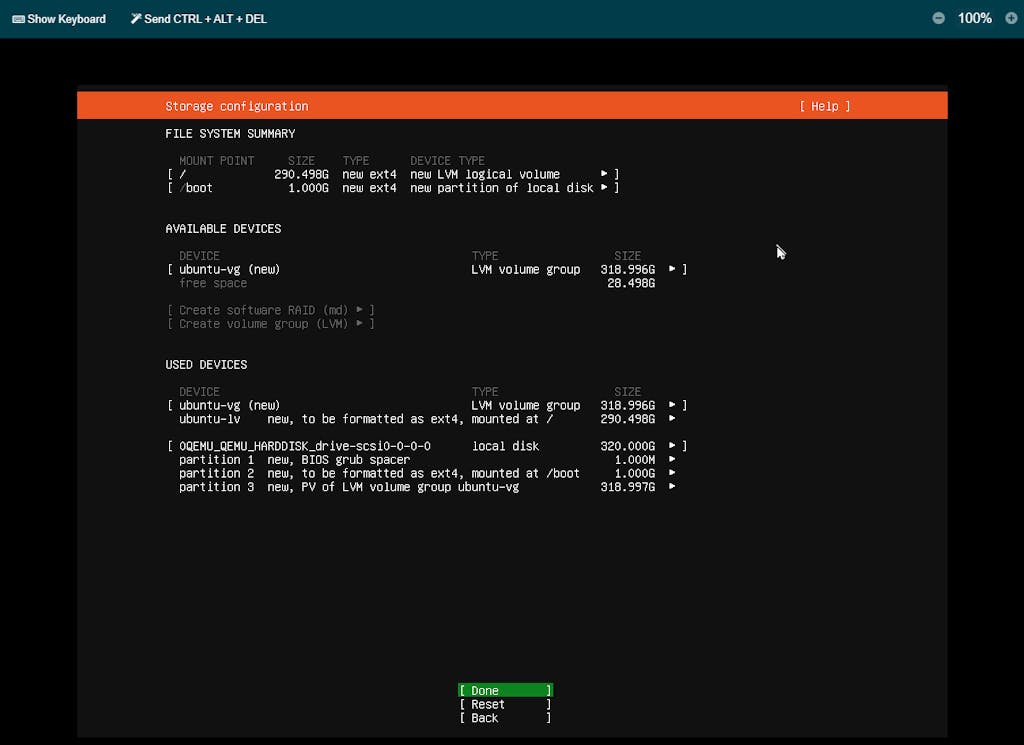
For storage requirements, define it here. For example, you can use the Logical Volume Manager group approach here. This will allow you to increase the disk size later on or you can unselect "set up this disk as an LVM group". If you don't want to partition the disk by using the LVM group function, you can deselect it, and, for example, just select "Use an entire disk" only.
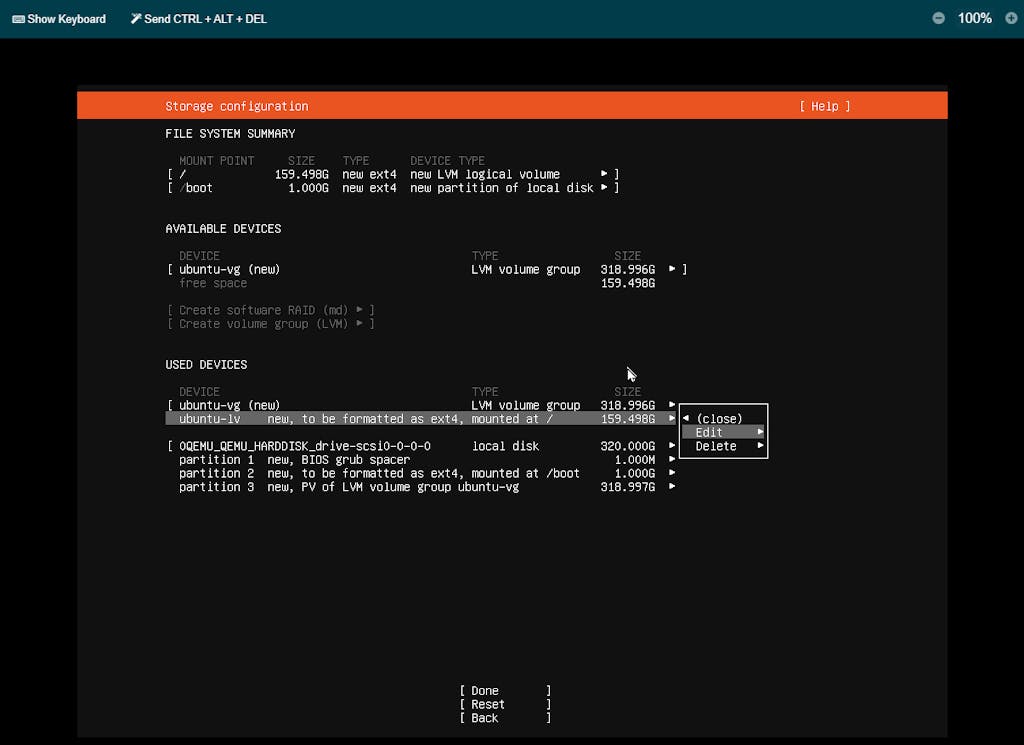
If you selected the LVM group option, you can select edit here to increase the size of the main allocated disk space by choosing edit on the menu par using the arrow keys:
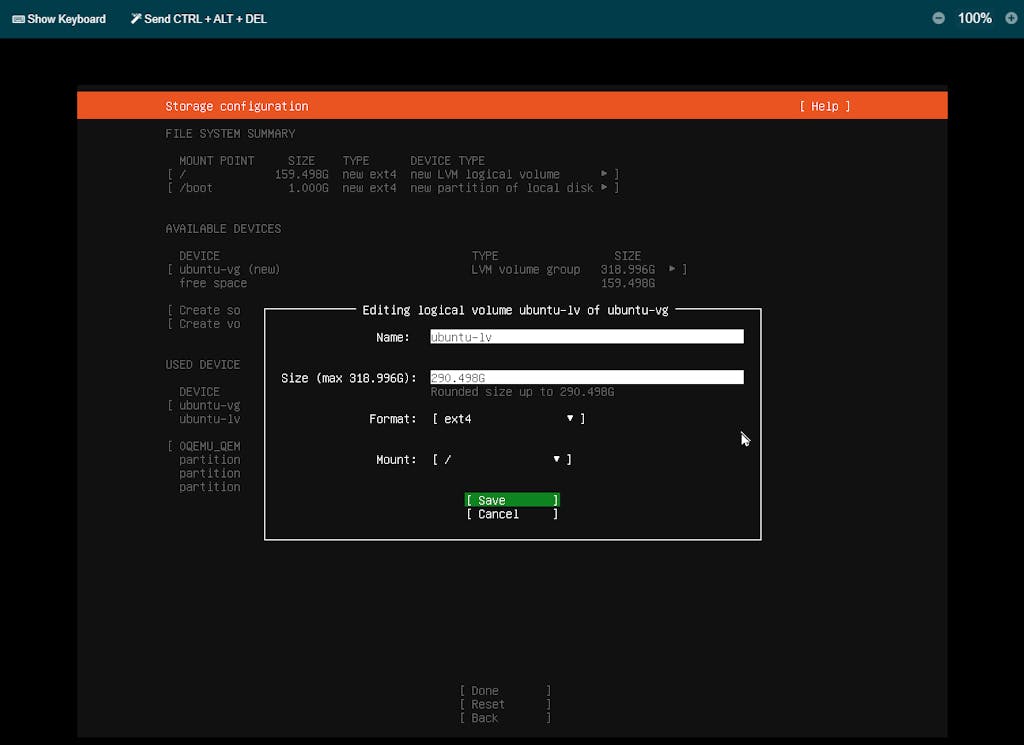
The select the amount you want to allocate and best to leave some extra space for yourself, just in case you need it later on for an additional partition and save:
Choose Done once you have the correct configuration and settings
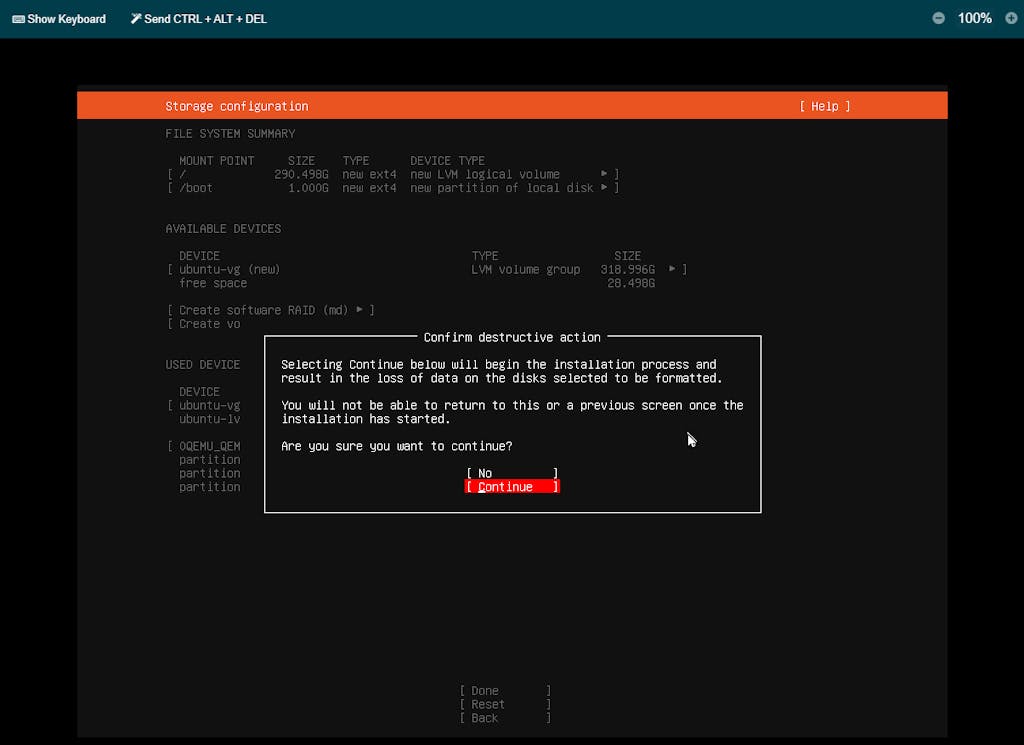
If anything was already there before you started the install you will be asked to confirm that you want to install as it will overwrite anything that was there previously:
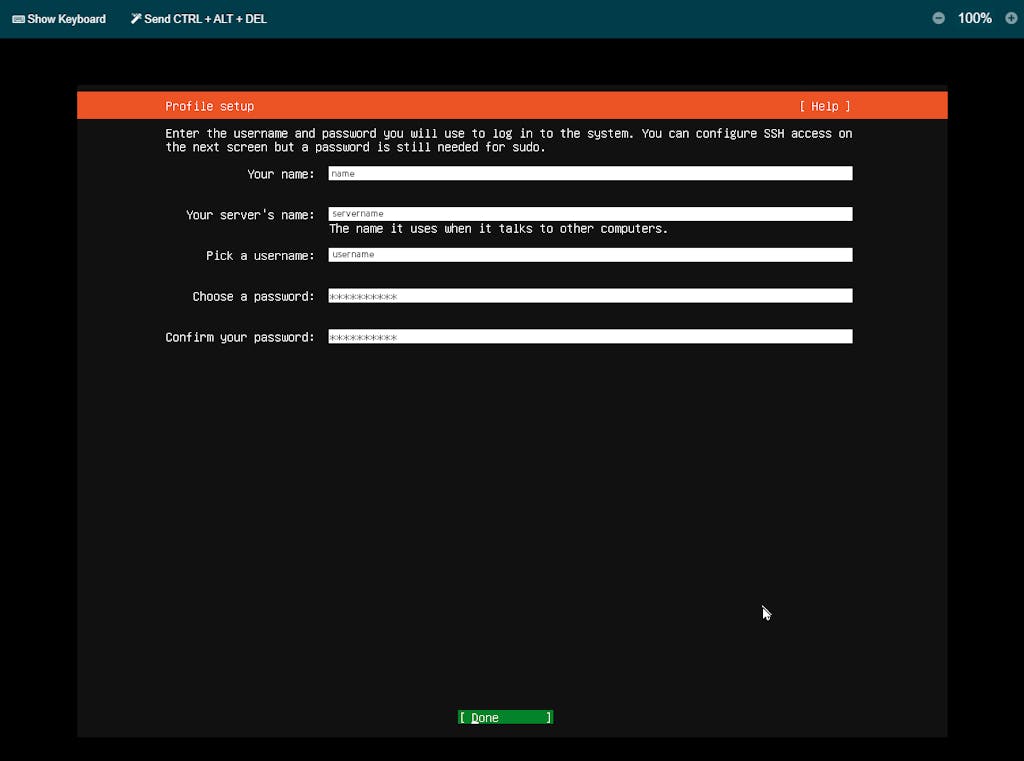
Profile setup
You'll then be asked to create your profile which consists of the:
- your name
- servername
- username
- password x2

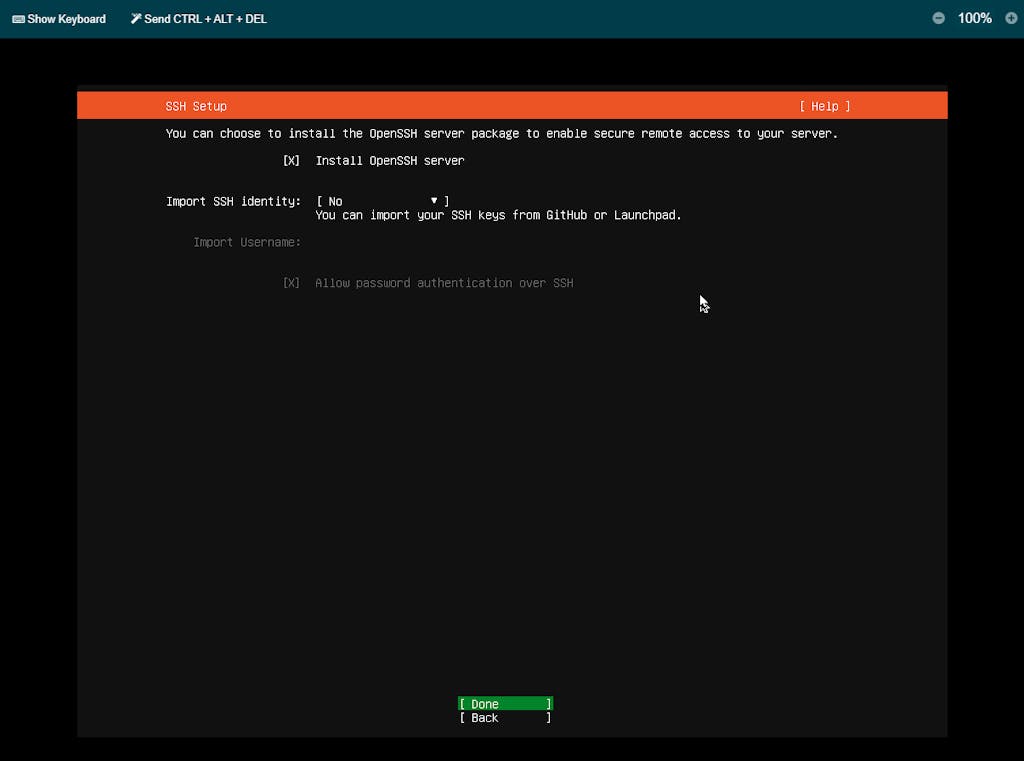
You can select to install OpenSSH to give you SSH functions (recommended)
Featured Server Snaps
You can, at this point, decide to install additional functions called Server Snaps. If in doubt these can be installed later fairly easily, so no need to install if you're not sure.

Once you click on 'Done' above the installation process will start

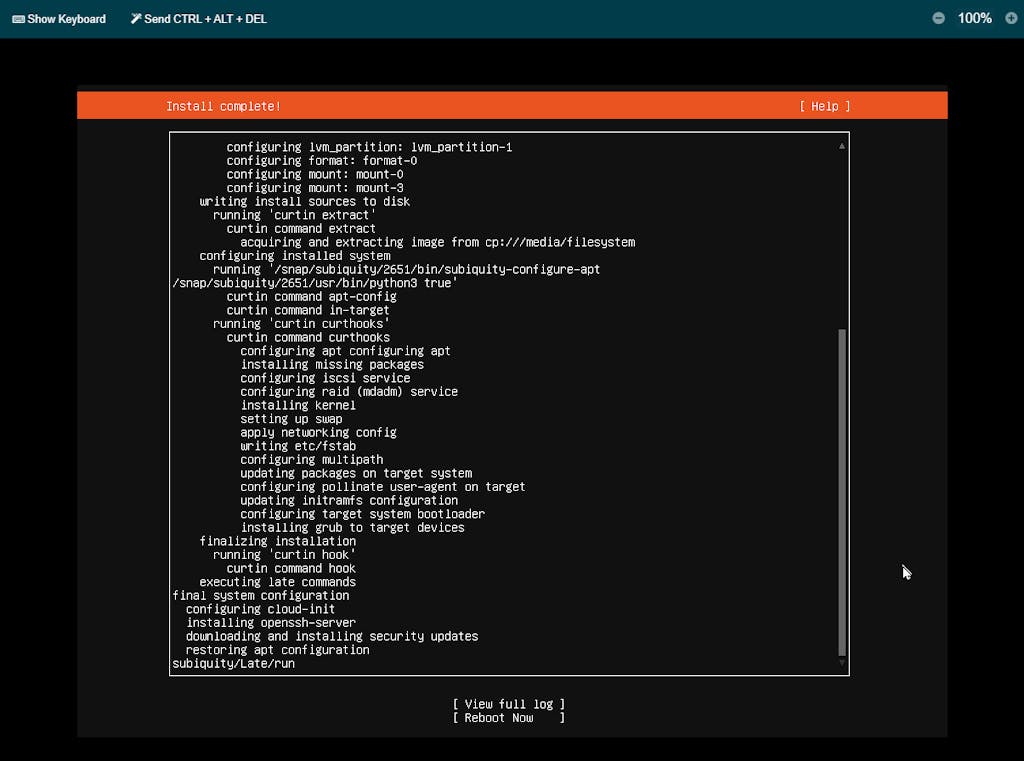
You will then see a message at the top that says 'Install Complete' once this process has completed
Then select 'Reboot Now' in order to restart the server and complete the process. Remember to detach the DVD/Image.
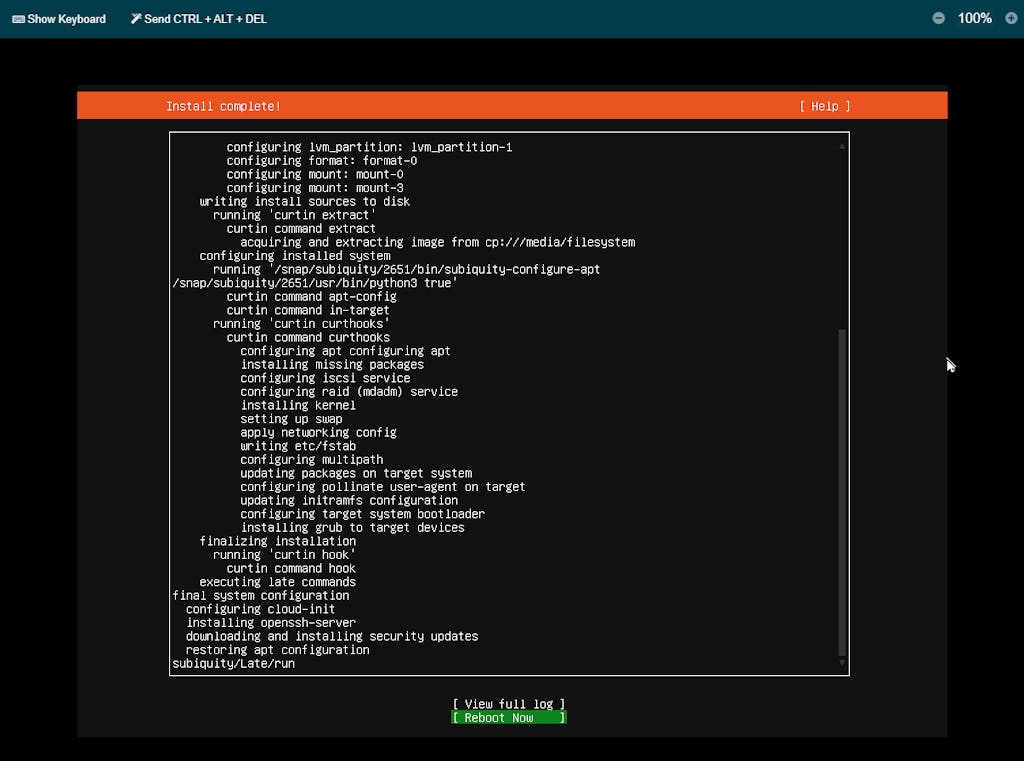
- Once you have finished installing, you'll see a message saying "Install complete !" (step 15 above). At the bottom, you can move down and select the "Reboot Now" option to see the installation complete and the server set itself up.
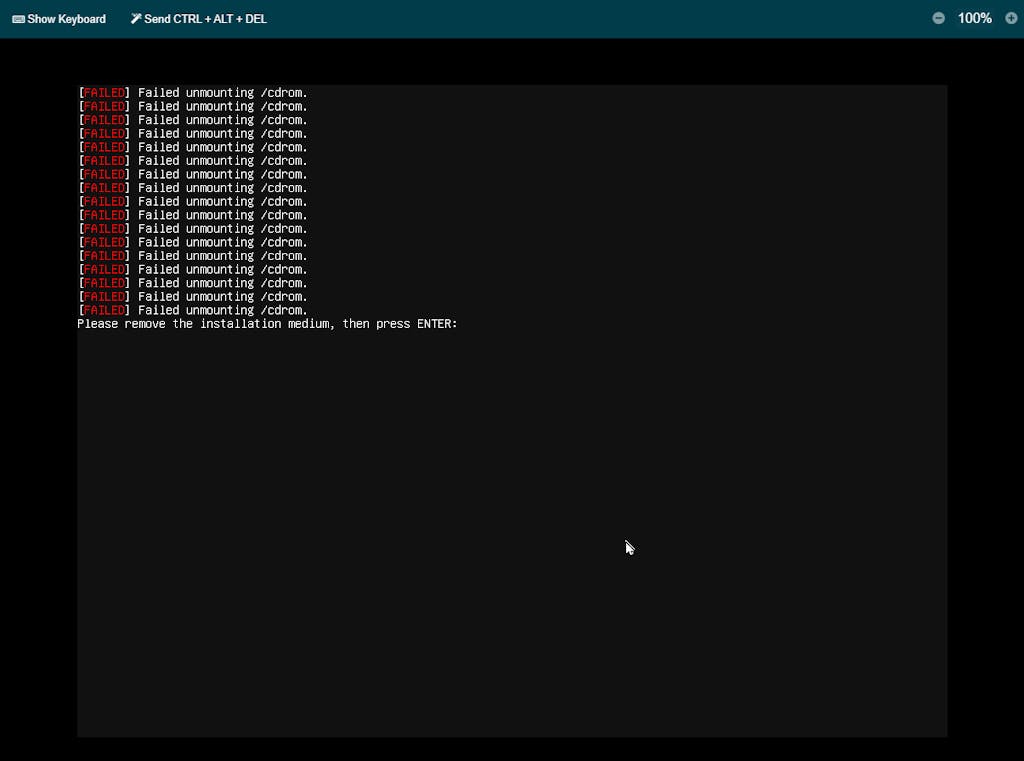
- If you still have the DVD set to boot mode (step 17 above), you will need to go back into your NetCup control panel and change that back by going into the "Media" tab and clicking on "DVD Drive", at the top of that section you need to click on "detach DVD". You can then go back to the VNC panel and press enter for the system to reboot without starting from the DVD.
- Once you have logged in using the 'username' and 'password' from above, you should switch to root command's by typing "sudo -s" if you need to change any of the server core settings.
- You will be asked for the [sudo] password for 'username' and once the password is verified, you'll be granted root privileges. If this is successful, you'll see the first part of server response switch from "username@servername" to "root@servername":
It would look something like this for example:

 myusername@myservername:~$ sudo -s

 [sudo] password for myusername:

 root@myservername:/home/myusername#
Next steps
It would a good idea to set-up SSH keys on the server and make sure that they work (before deactivating the password option to only use keys)