Very simple procedure. All you need is a small screwdriver and some gentle but determined hands 😉
Turn your closed netbook over
First turn your computer over so you can see the back of it as the image below:
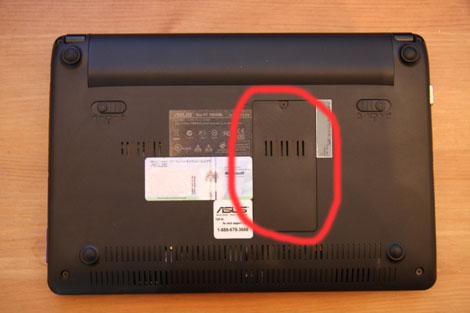
Location of panel to change memory
Circled in red is the panel that has 1 screw you will need to remove to get access to the memory module that needs to be changed.Remove the battery
I recommend that you remove the battery before attempting to touch the memory module.
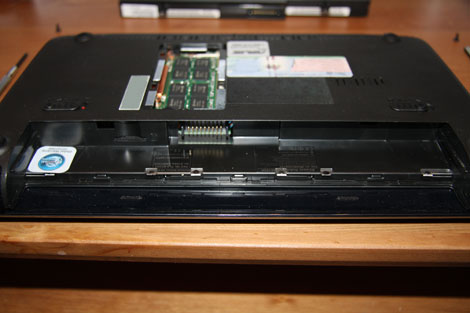
1005ha PU1X-BK with battery removed
Unscrew and remove the memory panel
Remove the screw as seen in the image below and remove the panel that will allow you to remove and replace the memory module:
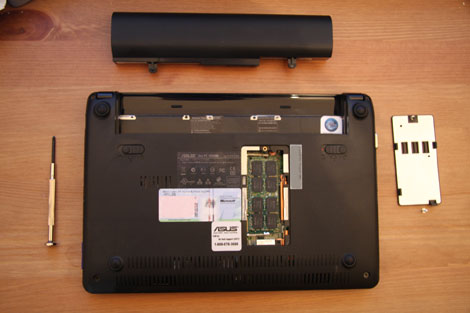
1005ha view of memory panel removed
Note: before touching the memory module I suggest you try to discharge any static electricity you may have. I grab hold of the chassis of my desktop for example. You should try to only hold the module by the edges and not touch any components on it. Avoid standing on a carpet for example or clothes that easily create electro static charge...Unlock the memory module
You now need to push back the tabs on the side of the memory module that are holding it in the locked position. You will be pushing these for the top one upwards and slightly down and the bottom one downwards and slightly back. This should be done gently there is no need to force this to allow the memory module to slightly spring up so that it is at lifting up at the end that has the tabs.
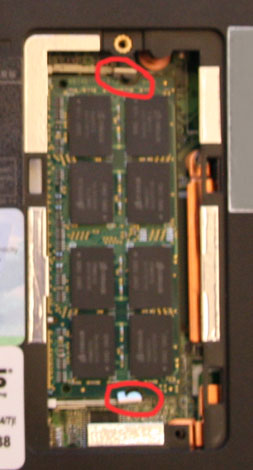
1005ha memory module in locked position
Release bottom tab on memory module
As you can see below the tab when moved back releases one side of the memory module and you then only need to release the other tab for the whole module to spring upwards.
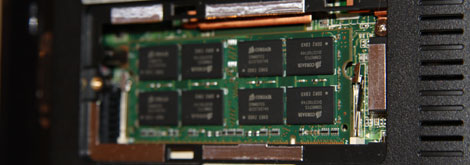
1005ha memory module bottom tab released
Remove the memory module
Once you have removed the tabs it should be slanted upwards on one side and look like the image below allowing you to then remove it. If you have an anti-static sleeve that your new module came in then put the old module in it so that if anything goes wrong with the new one you can at least put the old one back.

1005ha memory module slanted up
Add the new memory module
As you can see there is a groove on the memory module where it is connected to the motherboard. The number of pins above and below the groove is different so will help you know which way round the memory should be inserted. As you can see in the image below the groove on the connector is from the centre positioned to the left and the memory module therefore needs to be positioned in the same way .
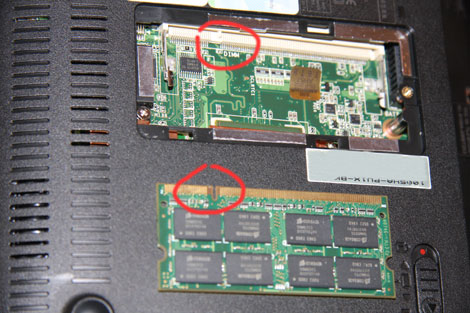
1005ha memory insertion markers
Put the memory panel back
You can now put the memory module panel back, clipping it back in, then screw the panel back into position.
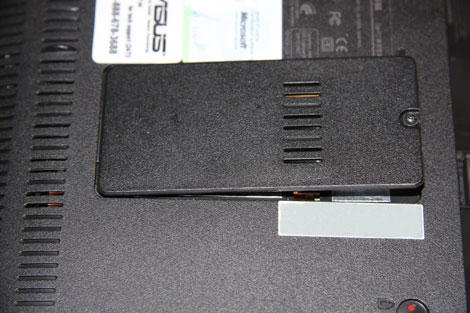
1005ha putting the memory panel back
There you go you now have upgraded your 1005 ha EeePC to the maximum memory of 2 Gig. You should be fully prepared for Windows 7 now!


